Sunday, December 1, 2019

Merchant & Mills: Curlew Long-Sleeve Dress in Gray Wool


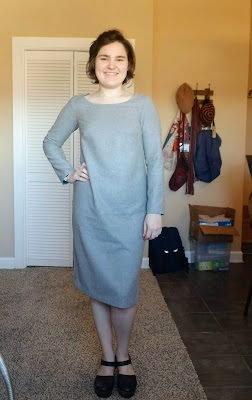
This dress is a recovery attempt from my first version of the Merchant & Mills Curlew, which I ever so ambitiously made of charmeuse. The result was so-so and said ever so gently, "Amateur," every time I looked at it. This time, I worked with a wool/poly blend and cut on the grain since my fabric amount was limited. SO much easier to work with.


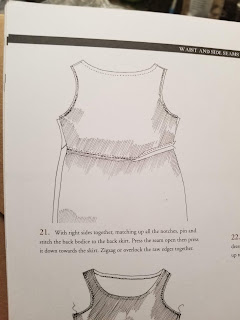
The Curlew hugs curves a little, but has a relaxed shape overall. I couldn't tell by the model's dress featured in the book that it actually has a bit of a pencil skirt and I had actually wanted to get an a-line shape. (If you are coming from Pattern Review, this next bit should sound familiar...) I also added sleeves, which I spent A LOT of time finagling in order to get them to fit in. I am still not happy with the fit along the back shoulders and the bust darts are still too low. I noticed that another reviewer noted how the instructions ask you to cut the darts when you cut out the pattern, and I agree with her that you need to sort adjustments out before actually cutting the darts out.  Also, the dress has a great feature that is not highlighted in the pattern book -- a curved seam across the back that  connects the bust darts. (click on pics to zoom!)


The following are a few fitting changes I made: I made the bust smaller, widened the darts, shortened the sleeves from the cuff and from the shoulder, cut with the grain instead of on the bias since I only had so much fabric. I finished cuffs and neckline with a sari silk ribbon. 
One thing I really liked about this pattern was the way it fit aside from the tightness in the back. It's very comfortable otherwise. I am also still in love with the seam across the back.


It's been a good experience, but both times I've made this dress, I spent way too much time adjusting things. However, there are other good staples and other things that I haven't tried yet that will bring me back to this book. Happy sewing!


Wednesday, November 6, 2019

Autumn Makes: Sarah Kirsten Rosemary Wrap Skirt & Cynthia Rowley 2054

Mississippi has finally broken its summer temps. For the first time in 5 months (starting in October since this post is so delayed) daily highs are lower than 90℉. I've made two things to ring in this season:  the Cynthia Rowley Simplicity Pattern 2054  and the Sarah Kirsten Rosemary Skirt. Links are in the pattern titles.

CR2054

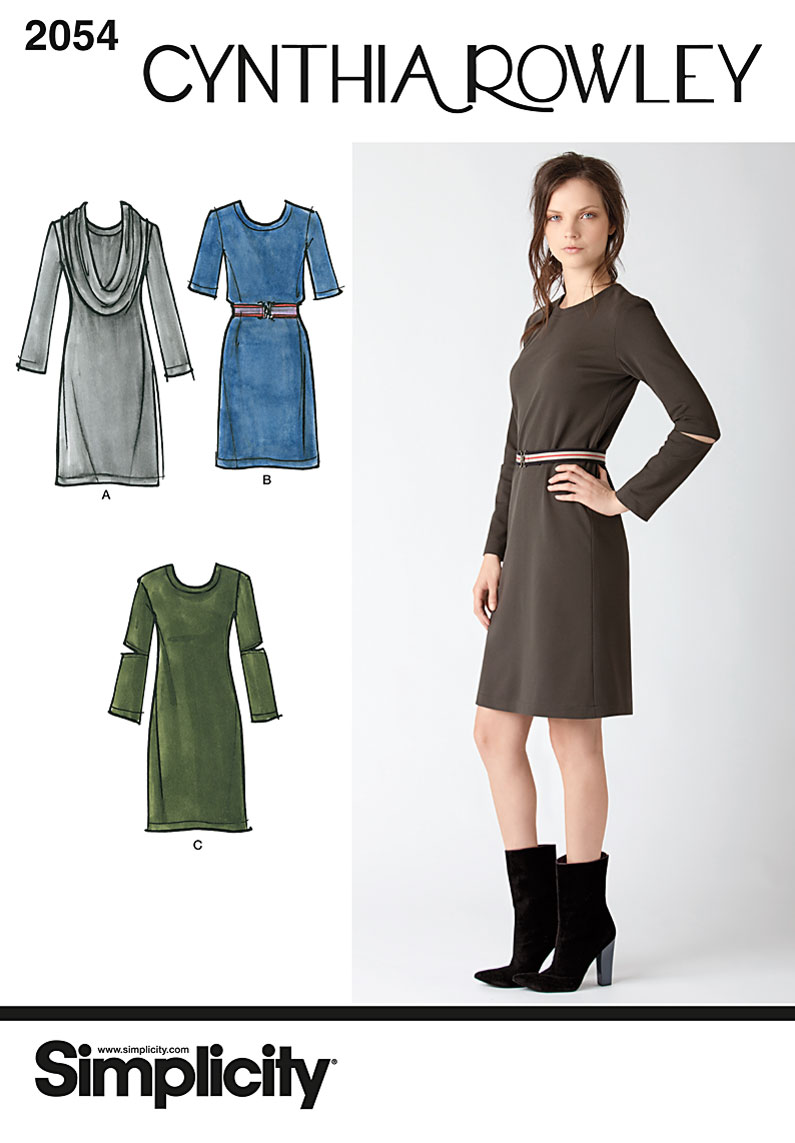
Cynthia Rowley S2054 is my fourth garment made with knit fabric and the only one that is presentable. It is a much heavier weight than all my previous projects, so it was much easier to manage. It's simple and easy to follow. Of course, I didn't do the sleeve extensions because I thought the exposed elbows were a little weird. I was out of black thread, but determined to sew, so I used purple thread. The elevator also happened to be out the weekend that I made this, so there was no way I was going to leave my 11th floor apartment unless necessary. 


Image result for simplicity cynthia 2054 pattern
It goes great with my favorite leather jacket. (Thanks, Steve 😍)

Sans favorite jacket 😒

Excuse the post-workday wrinkles!

SK Rosemary Wrap Skirt

_U5A1976.jpg
Sarah Kirsten Rosemary Wrap Skirt

As I am more drawn to wovens and love a good wrap skirt, I was ecstatic when Sarah Kirsten sent out the announcement e-mail for the Rosemary.  Someone looking to purge their stash gave me a mustard cotton that I decided might look nice. I usually avoid mustard-colored anything, but I like to think I can pull it off. I initially wore it to a local car show (Eurofest: Ridgeland, MS).


A few notes: next time, I will lengthen it. It's good short for the summer and fall, but it's a tad too short when sitting for me. There is not loop or button hole to put the tie through to the other side. You just fold it over, but it works since the ties are so narrow. 
The fit is SO good. I gravitate towards things that fall at the natural waist and this would be one. I think I'll make a winter variation and see how that goes.


Happy Sewing!

Sunday, August 4, 2019

Dressmaking at Home: Dress F

Sewing slumps always seem to happen when you've gotten comfortable. Something has been finished, nothing too hard, of course, but still something you have needed to finish for while, and you feel accomplished, so you 'take a break' and ponder some projects and before you know it, you've tripped, fallen, and slid to the hard, rocky bottom of Motivation Mountain. And that's where I was last week, so I knew I had to sew something, lest I stay there.


So, I decided to make Dress F from Dressmaking at Home by Machiko Kayaki. It's a tea length dress with fish-eye darts at the waist, short sleeves, and a waist tie at the back. There is also facing at the neck and a zipper. This is the second time I have made a dress from this book and I enjoyed this one a good bit more for some unknown reason. 


The fabric I chose is from my Portland 2019 stash. It has little cobalt and orange birds flying around long wispy white blades of grass on a black background. I am really not sure of what the fiber content is, but it I would guess a very fine and light piqued cotton. It's very flowy when you wear it and does wrinkle, but doesn't hold them too much. Moving to adjustments, the only real change I made was that I left out the fish-eye darts on both the front and the back and it's very comfortable. I made a size 13 (Japanese standards) and added 1/2 in seam allowance to the pattern pieces when I cut them out. 


These pics were taken after a whole day's wear and after a long car ride, so it has a few wrinkles and the facing and bow are a little scrunched up. Glancing at the pattern, it reminds me a little of a subdued/modernized 1930's day dress. Edge stitching along the neckline is absolutely necessary to keep the facing in place, by the way, so don't skip it, like I wanted to. I am also someone who makes the sleeves first and then puts the whole thing into the armhole. However, I switched things around and sewed the sleeve and armhole seam first, then the dress and sleeve sides, and finally finished the sleeve hems. Turned out fine.
Inspiration???


This creation definitely lifted me out of my sewing rut and I have already lined up my next project. I think I reached a certain level of skill after making this. It feels a bit more polished than previous works and I didn't have to reference directions too often. With the exception of that zipper installment, my work looked well-finished, I thought. I would love to make this again!

Before I wrap this up, I just want to mention the recap Deepika did on Pattern Review Weekend in Portland this year. Below is the link to the lovely blog post that touches on just a bit of the joy we had talking about sewing, listening to seminars, buying fabric, and sharing drinks together! 🍻
PRW


Happy Sewing!


Saturday, June 1, 2019

Oliver + S Popover Sundress: Dress A Girl Around the World


After coming back from PRW, I knew my scrap mountain had finally reached it's limit. So, I decided to do a charity project to bust the ridiculous amount of cotton bits and pieces and notions I have leftover from past projects. I decided to go with Dress a Girl Around the World, and maybe next time I'll find a project for boys to balance things out. This particular one is exactly what it sounds like: making dresses for girls who are overlooked in particular cultures strictly based on gender. The program puts it best on their own site:

Dress a Girl Around the World is a Campaign under Hope 4 Women International (a 501 (c) 3 organization) bringing dignity to women around the world since 2006.  Hope 4 Women International is a nondenominational independent Christian organization.  Visit our website to learn more at Hope 4 Women International
We dream of a world in which every girl has at least one new dress.  We want girls to know that they are worthy of respect, and that they are loved by God.


I decided to go with a simple, but cute ( and free!) printable PDF pattern from Oliver + S:
https://oliverands.com/community/blog/2015/08/popover-sundresses-for-dress-a-girl-around-the-world.html?crlt.pid=camp.cJLtge1pKByd

I loved the results of the mismatched fabrics! Honestly, I wish I was 4 again so I could wear them. A person can finish one easily in an hour. The ties are adjustable closures and it has an A-line shape.
It is super easy to make and easy to add features such as trims or extra seams, and I am thrilled that they can make a little girl feel cared for and special. There is no other feeling like putting on and stepping out in a dress you love.
I made 7 dresses (four size 3s and three size 5s) and later today I'll be sewing these labels on the outside.


So here are my results (that still need more ironing):


All that's left to do is iron, label, pack them up, and send them out.
Happy Sewing!

Tuesday, May 28, 2019

Named's Breaking the Pattern: Ruska Dress

Image result for ruska breaking the pattern

I've never been one to do last minute sewing before I intend to wear it and I nearly threw this one to the wind because I was so close to the deadline and thought I would not finish it. My flight to PRW 2019 (in Portland, OR this year) was at 11:30 am Thu and I had work from 6:00-8:30 am before heading to the airport, so when I was still sewing on those metallic accents at 10pm on Wed, I decided I might just leave it. But I didn't.


Ruska is a pattern from Named's book Breaking the Pattern. It is a very interesting collection, such a mix of minimalist and streamlined items (inspired by classic shapes), usually featuring some sort of quirky or distinct characteristic -- comfortable but fresh. There is nothing terribly complicated, just good clean lines surrounding a little challenge. Before the Ruska, I had only worked with knits 1 time before and I didn't really know what I was doing. However, with the the Ruska, I took the time to make a plan, which is a little earth-shattering for me. I found out about the miracle called the triple stretch stitch and I learned about the importance of the weight of the knit. 


I added a silver stem stitch around all exposed hem seams on the front of the garment. I did the hem of the upper front (the bow piece) first and it was a nightmare to sew with the metallic thread. I started waxing the thread after that, which made it easier, but I found that stabilizing the thread between my finger anywhere between the needle and the thread's exit point from the last stitch helped prevent knots and uneven tension.

I experienced some rolling around the hem of upper front piece, which tells me that I either stretched the fabric and it's not going to go back to it's original shape, or I just need to use a heavier weight knit. Overall, I'm pleased with it and would like to make another. It was super easy and I gained such good experience with knits, which I had a unspoken fear of since I typically just go with wovens.
Happy Sewing!


Friday, May 24, 2019

The 50 States: Oregon -- Deer & Doe Agave Skirt


My trip to Oregon was a little unexpected, but such a blessing. I didn't think I'd be going to OR anytime soon, but then I saw that Pattern Review Weekend 2019 was going to be in Portland, so I said "why not?"
I think I expected Portland to be a more aggressive city, like the stereotypes more commonly associated with big East Coast cities, but it was more mid-western, friendly, and artsy than I expected, and it was a great time with all of the Pattern Review people. Loved it!💕 I made some great new friends and we all spoke the same (sewing) language! It was truly a time of discovery. It was also just what I needed after being in another job-hunt funk.


While there, I visited downtown, the Saturday Market, the Japanese Gardens, Lan Su Gardens (where I had some lovely mooncake and tea), and the International Rose Test Garden and met up with a friend from MS. The scenery is wonderful; lots of tall, dark mountains, gray clouds, and cool, quiet lush forests. We heard from Anne Whalley and Peggy Mead, and Deepika hosted a workshop on reverse appliqué sewing! I was exhausted after that long but exciting weekend.


Lan Su Gardens
small glimpse of the Japanese Gardens
Some PRW  swag!😁
More Japanese Gardens

And lunch on w/fellow PRW-ers!

For this garment, I chose some nani IRO linen (Kokka Linen Floral Blue Sheeting) that I actually saw in the Atelier to nani IRO sewing pattern book. I loved it, but never thought I would get it! But in the that same vein of unexpected things, I found it in Bolt Fabric Boutique. Of course, I bought it along with some other lovely fabrics. We also went to Pendleton Woolen Mills, Mill End Store, Josephine's Dry Goods, and Portland Fashion Institute Supply.

So let's move on to the actual project. The nani IRO print has roses on it, which is appropriate since we did visit the City of Roses. It was an unexpected and wonderfully colorful find, though, much like my experience in Portland. I chose the Deer&Doe Agave Skirt since the attendees of PRW got a coupon for it. It is a modern asymmetrical style, with variations that make it reversible, lined, or just with facing. I swapped the buttons for wrap skirt ties and lined the whole thing.  Easy to make, but the instructions were not as clear. I am very pleased with the outcome, though! 


I'm so glad that I finally laid hands on some nani IRO and it worked out so well. 🎉
Should be leaving a review for this and a Named dress on Pattern Review this week.
Happy Sewing!